This article details the management of Products.
a) Adding new products
A new product can be added by clicking on the Add button ( ).
).
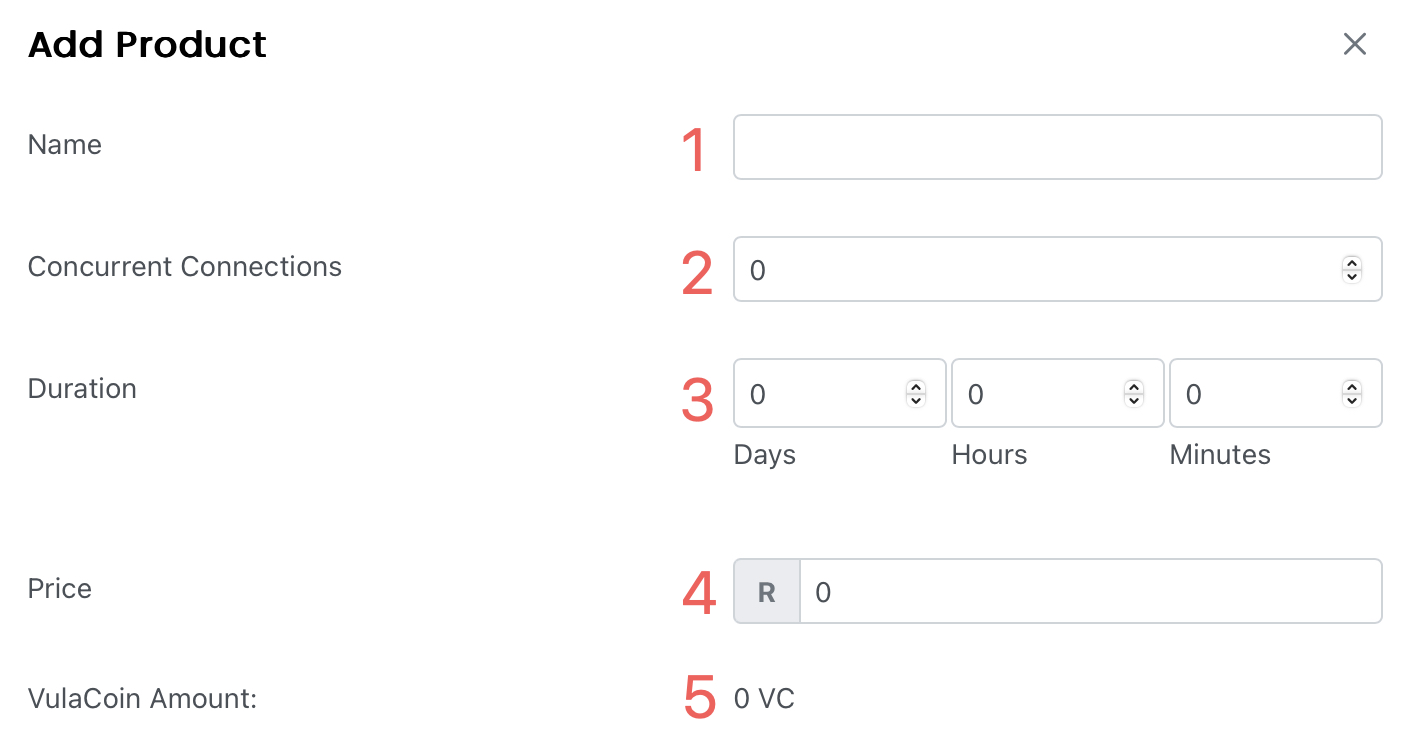
1. Name - This is the name that will be displayed on the user interface for the bundle.
2. Concurrent Connections - This dictates the number of authenticated devices that can use the bundle after it is purchased by a user.
3. Duration - The time duration can be set for the bundle in Days, Hours & Minutes.
5. Price - This is the ZAR value of the bundle (R1 = 96VC).
6. VulaCoin Amount - This is the equivalent VulaCoin amount of the price (R1 = 96VC).
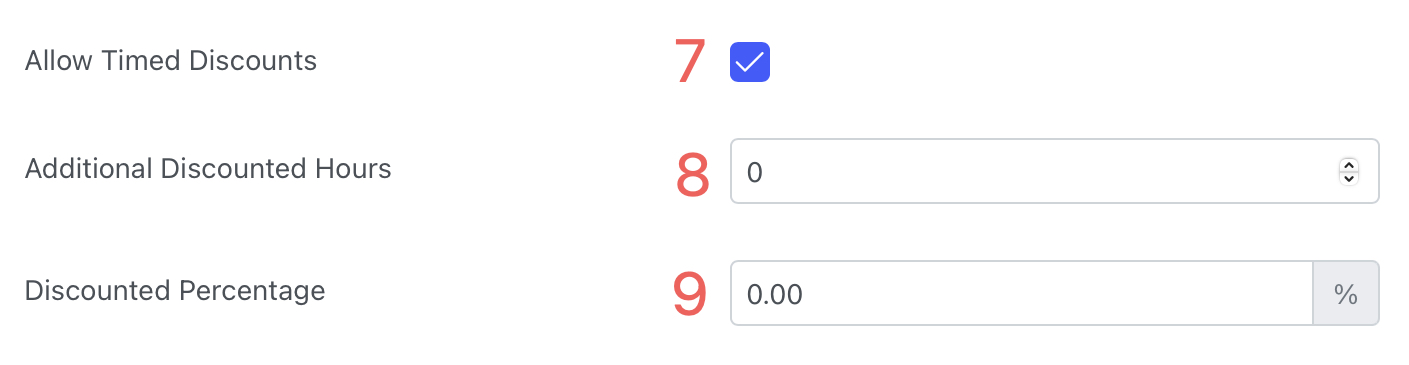
7. Allow Timed Discounts - Checkbox to enable timed discounts.
8. Additional Discounted Hours - How long the timed discount will be available after an active bundle runs out.
9. Discounted Percentage - This is the discount that gets applied to the product if purchased within the time set in point 8.
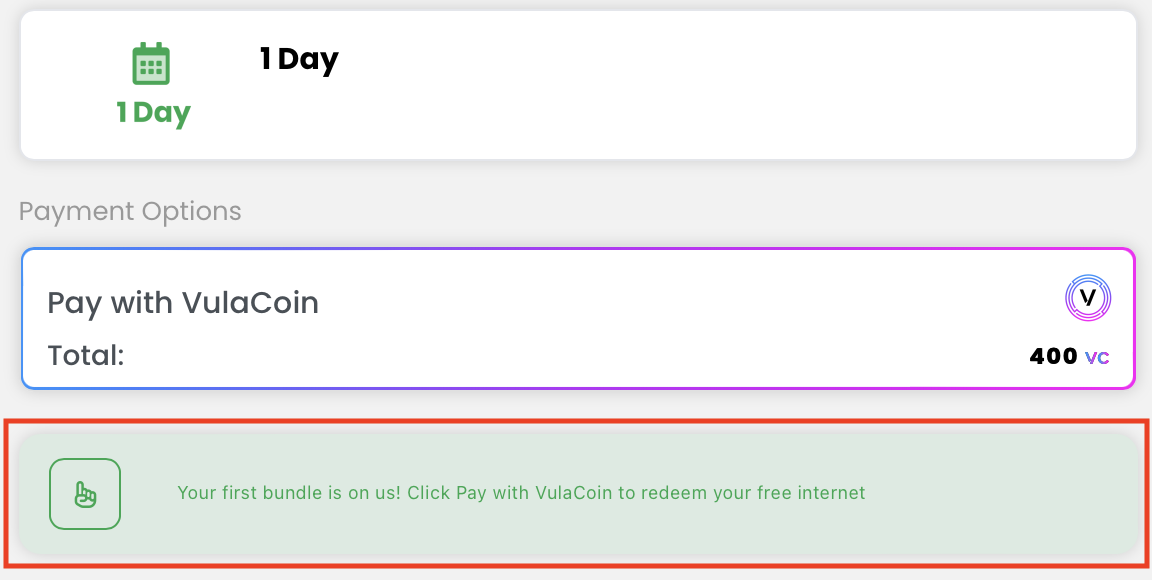
If a user purchases a bundle, during the bundle duration plus the additional hours (if applicable), users are eligible to receive the discounted percentage should they wish to purchase another bundle. Users would see a banner on the product where timed discounts are applied.
.png)

10. Enable tribe price - Checkbox to enable tribes (Allows for up to 5 numbers per tribe).
11. Tribe price - The price per tribe bundle (If a member of a tribe purchase a tribe product, the tribe price will be charged and all members in that tribe will receive the product.
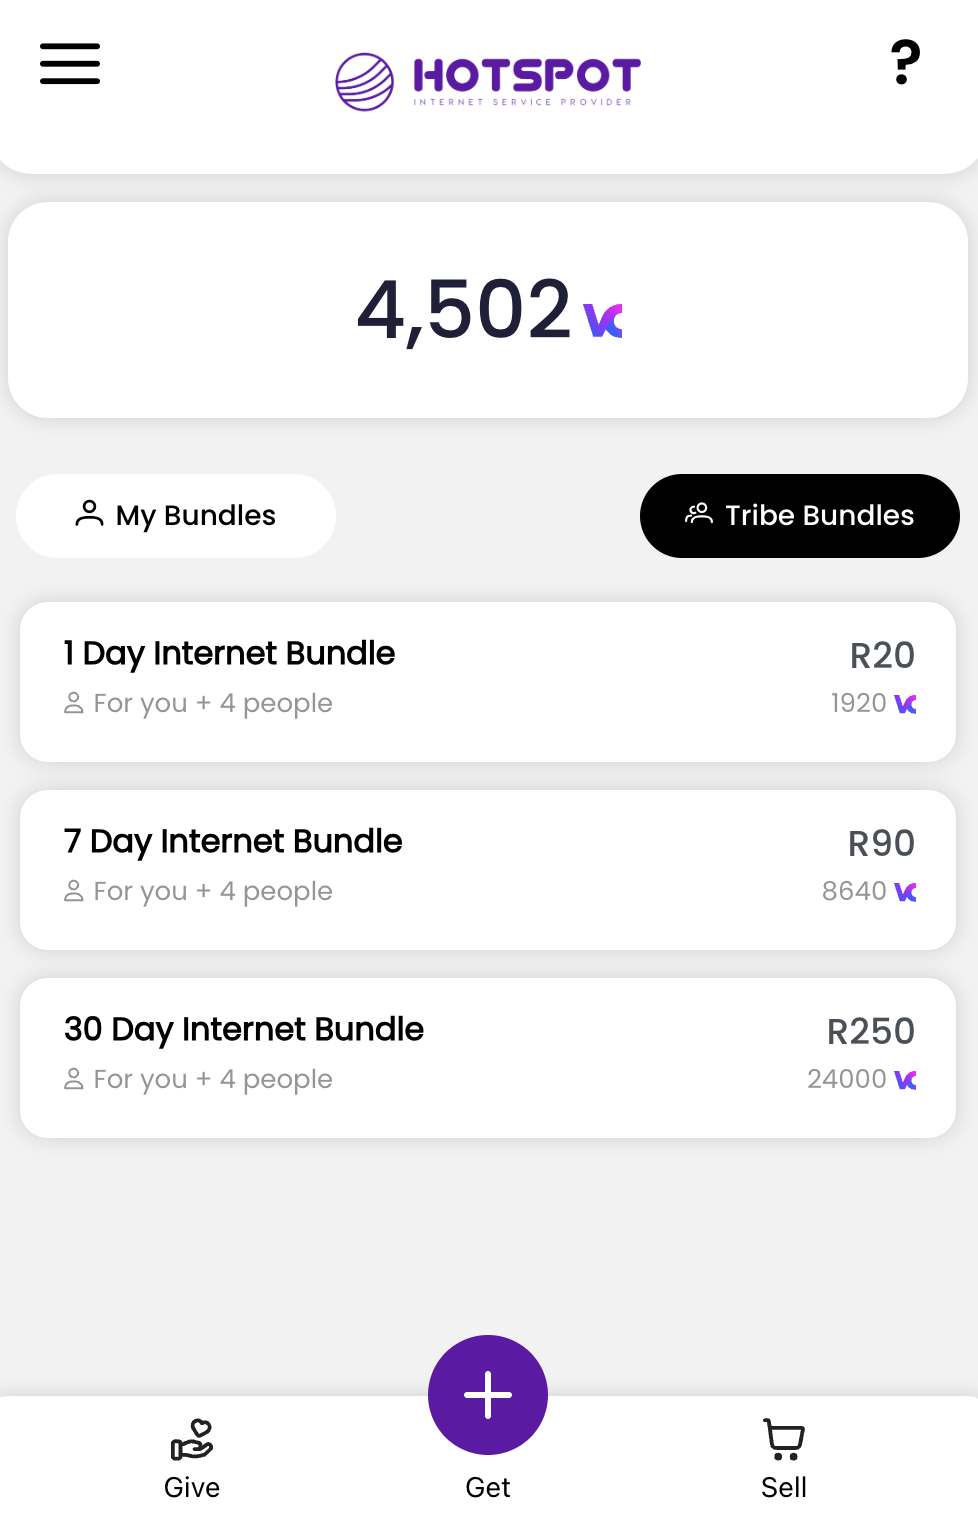
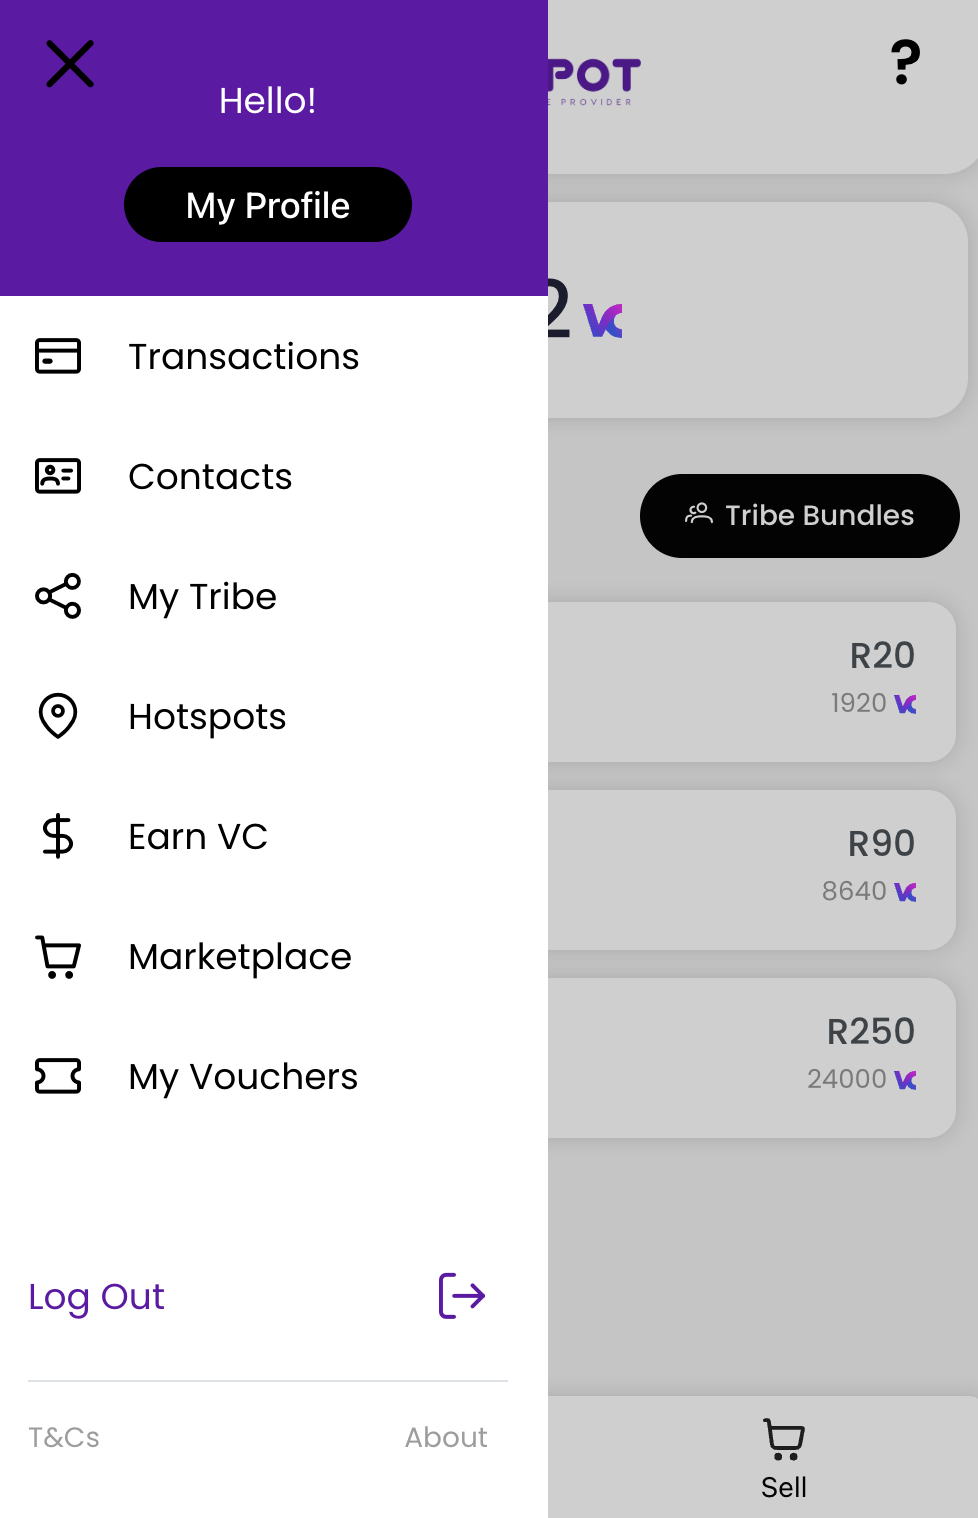
Users can purchase a tribe bundle by selecting the "Tribe Bundles" tab:
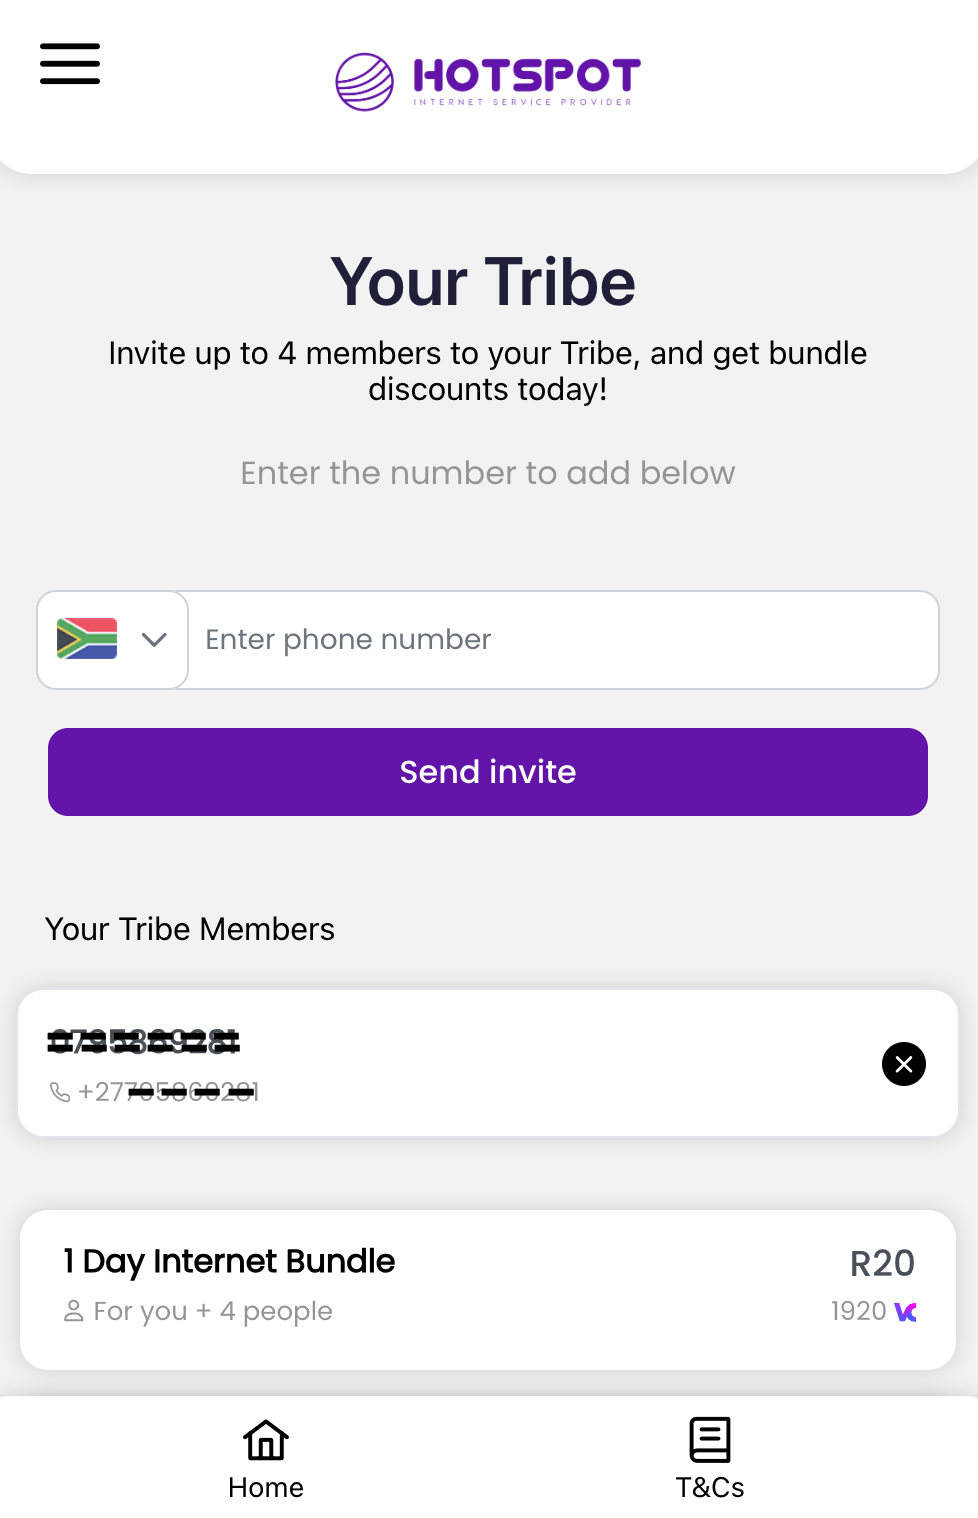
To add tribe members, users can open the menu button the the ISP wallet, select "My Tribe" and add members to their tribe by entering their phone number.
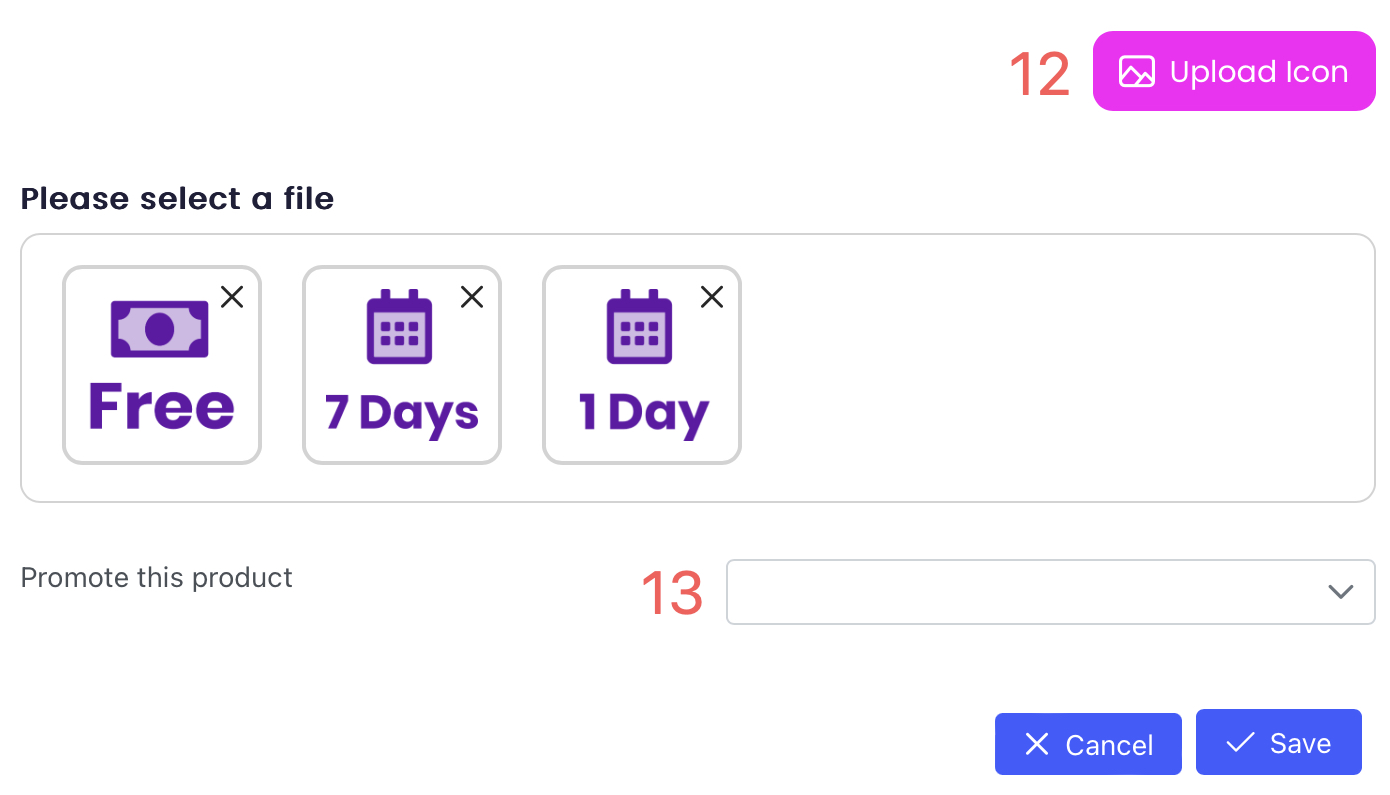
12. Upload Icon - You can upload an icon that will be displayed on the user interface.
13. Promote this product - You can promote the product and can set the frequency of the promotion. Please note that this feature is optional and if no option is selected, the product will always be displayed.
i) Daily

- The frequency can be set to daily and the product will be displayed every day of the week on the user interface.
- A Hint Text can be added which will be displayed on the user interface under the product.
ii) Specific days
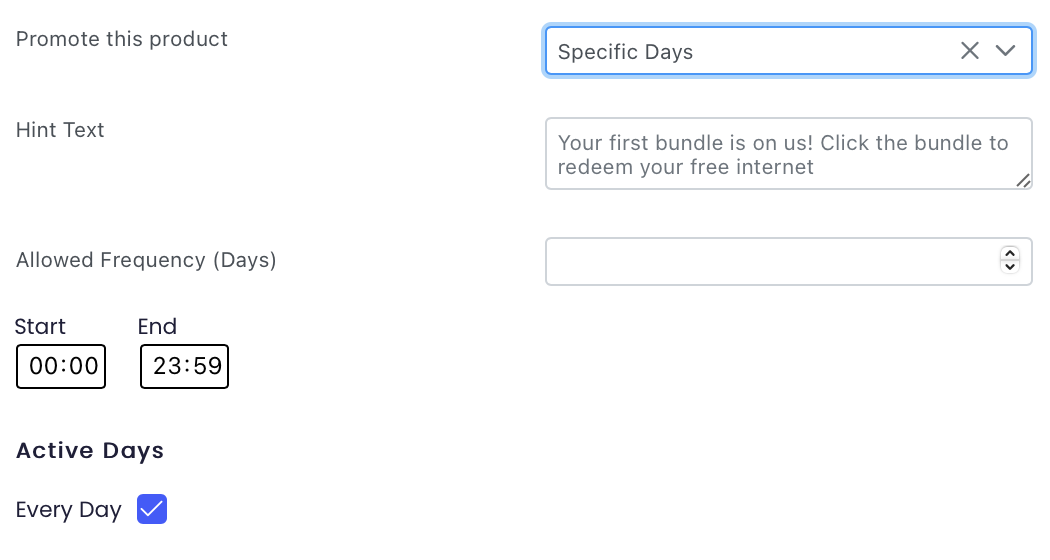
- Select Specific Days in the drop down list.
- A Hint Text can be added which will be displayed on the user interface under the product.
- This metric will determine how often the user can use campaign as a payment mechanism. e.g., 0 = unlimited use, 1 = once a day, 2 = once every two days, and 3 = once every three days.
- The promotion can be run every day of the week by ticking Every Day.
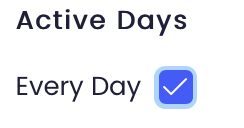
- Alternatively, the promotion can be set to run selected days of the week. The days of the week will be displayed when you untick Every Day.

14. Tags - only display products with a tag
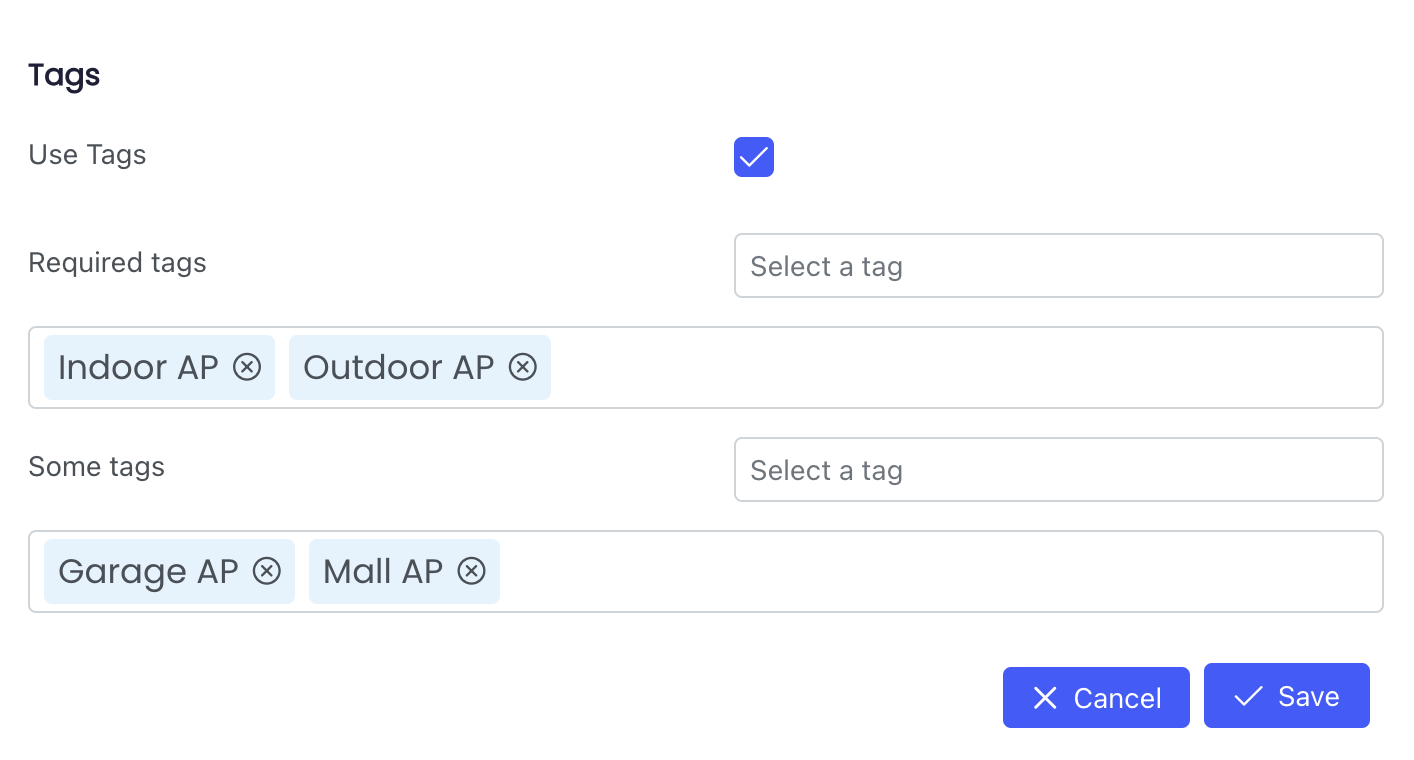
i) Required tags - All tags listed must be associated* with the hotspot. (if empty then this will not prevent the product from showing)
ii) Some tags - At least on tag listed must be associated* with the hotspot. (if empty then this will not prevent the product from showing)
A hotspot is associated with a tag if the hotspot is within a geofence group that has this tag. If both criteria are met then the product can be bought at the hotspot. Review the "tags" section in article 3.10.2 Hotspots, to configure the geofence, tags and hotspot group.
b) Viewing and editing existing products
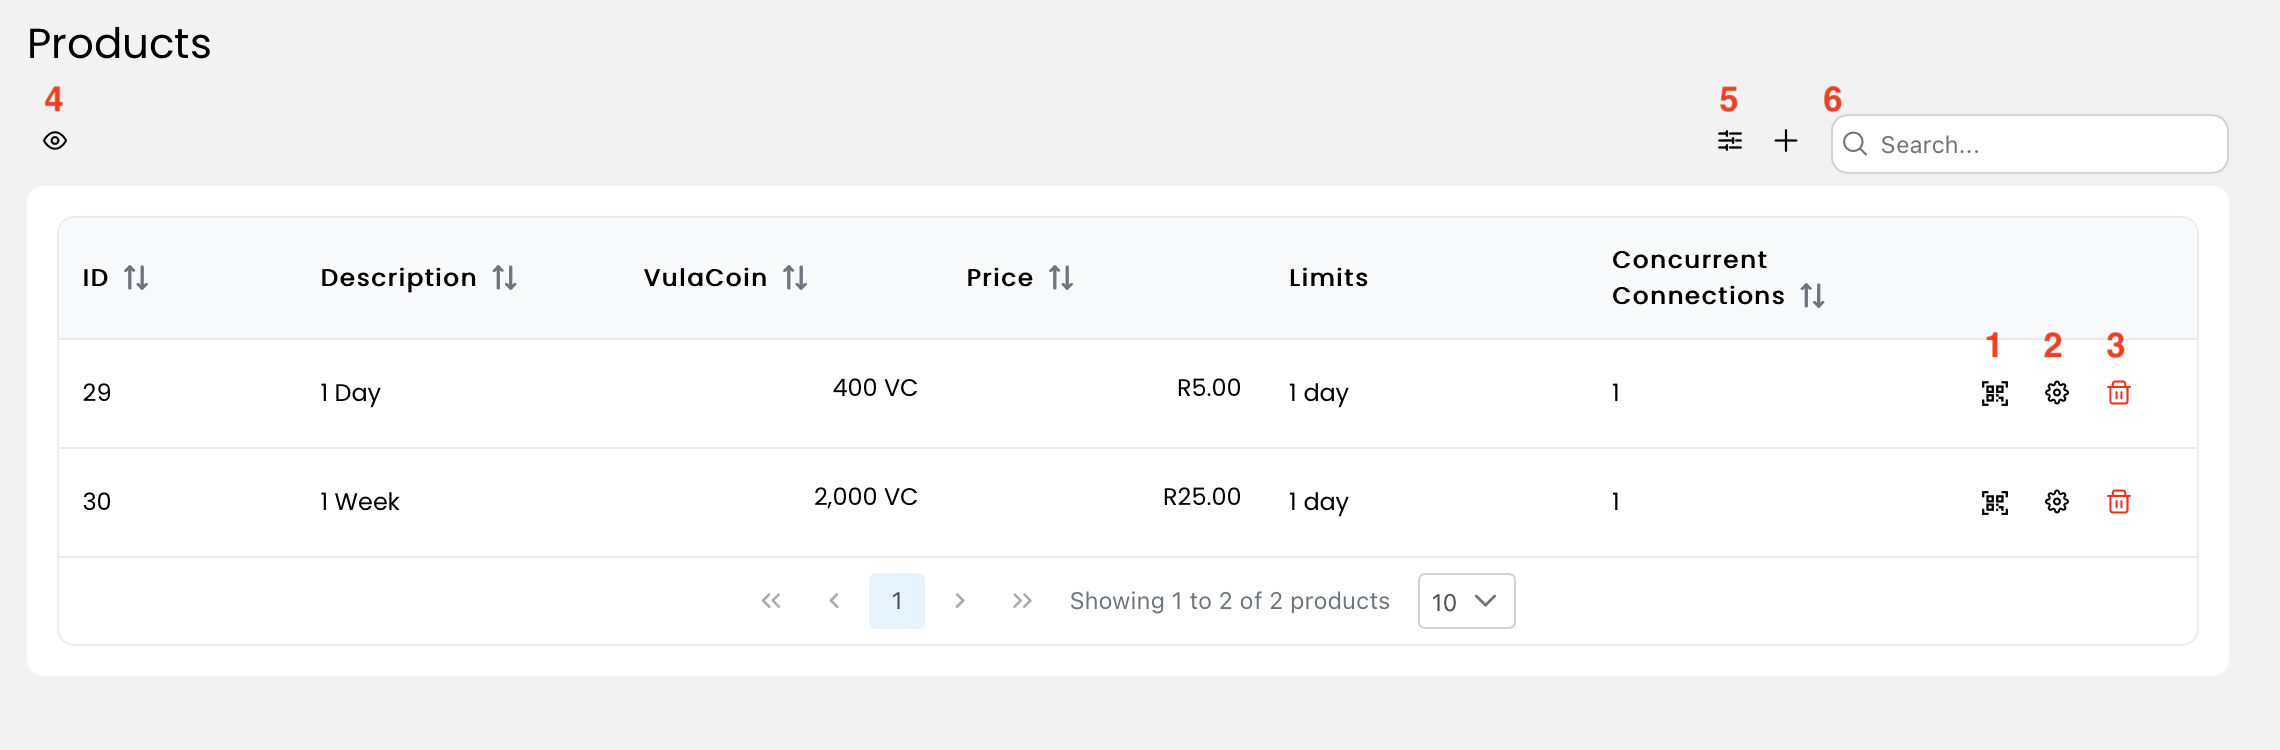
1. QR code - When you click on the QR code icon ( ), you can:
- Scan the unique QR code with your phone which will display the payment options for this specific product.
- Click the link Link button to display the payment options for this specific product.
- Download the image to your desktop.

2. Settings - You can edit any parameters of the product by clicking on the Settings button ( ).
).
3. Delete - You can delete any product by clicking on the Delete button (  ).
).
4. View all products - You can click on the View button ( ) to show how all products will be displayed on the user interface.
5. Dynamic products
- When you are on the Products page, click on the Slider icon (
 ) to open the menu.
.png)
1. Ensure that you have clicked Allow Dynamic Products.
2. You can set the Conversion Rate between 1 VC = 60 seconds to a maximum 1 VC = 1 hour.
3. You can set the Maximum Dynamic Product Time which will determine the upper time limit of the dynamic products that your users can purchase.
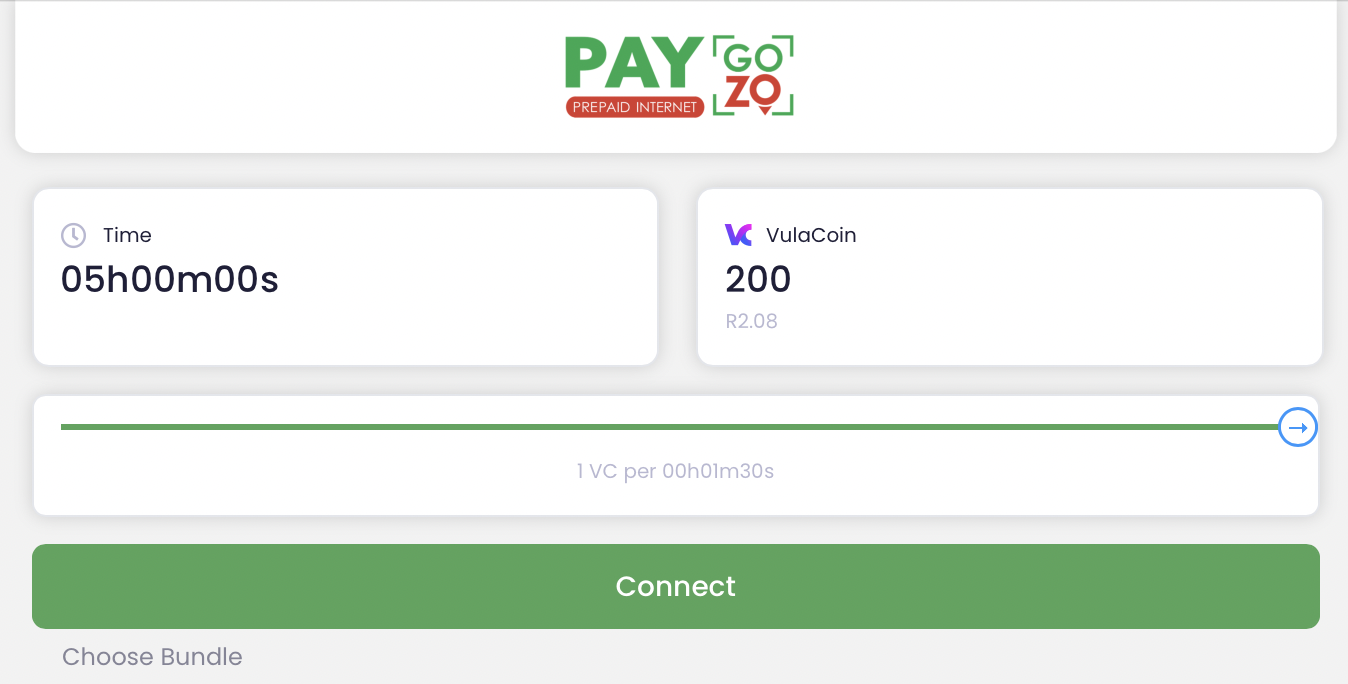
The user interface will be displayed with the different Bundles, or the option to set a Dynamic Product.
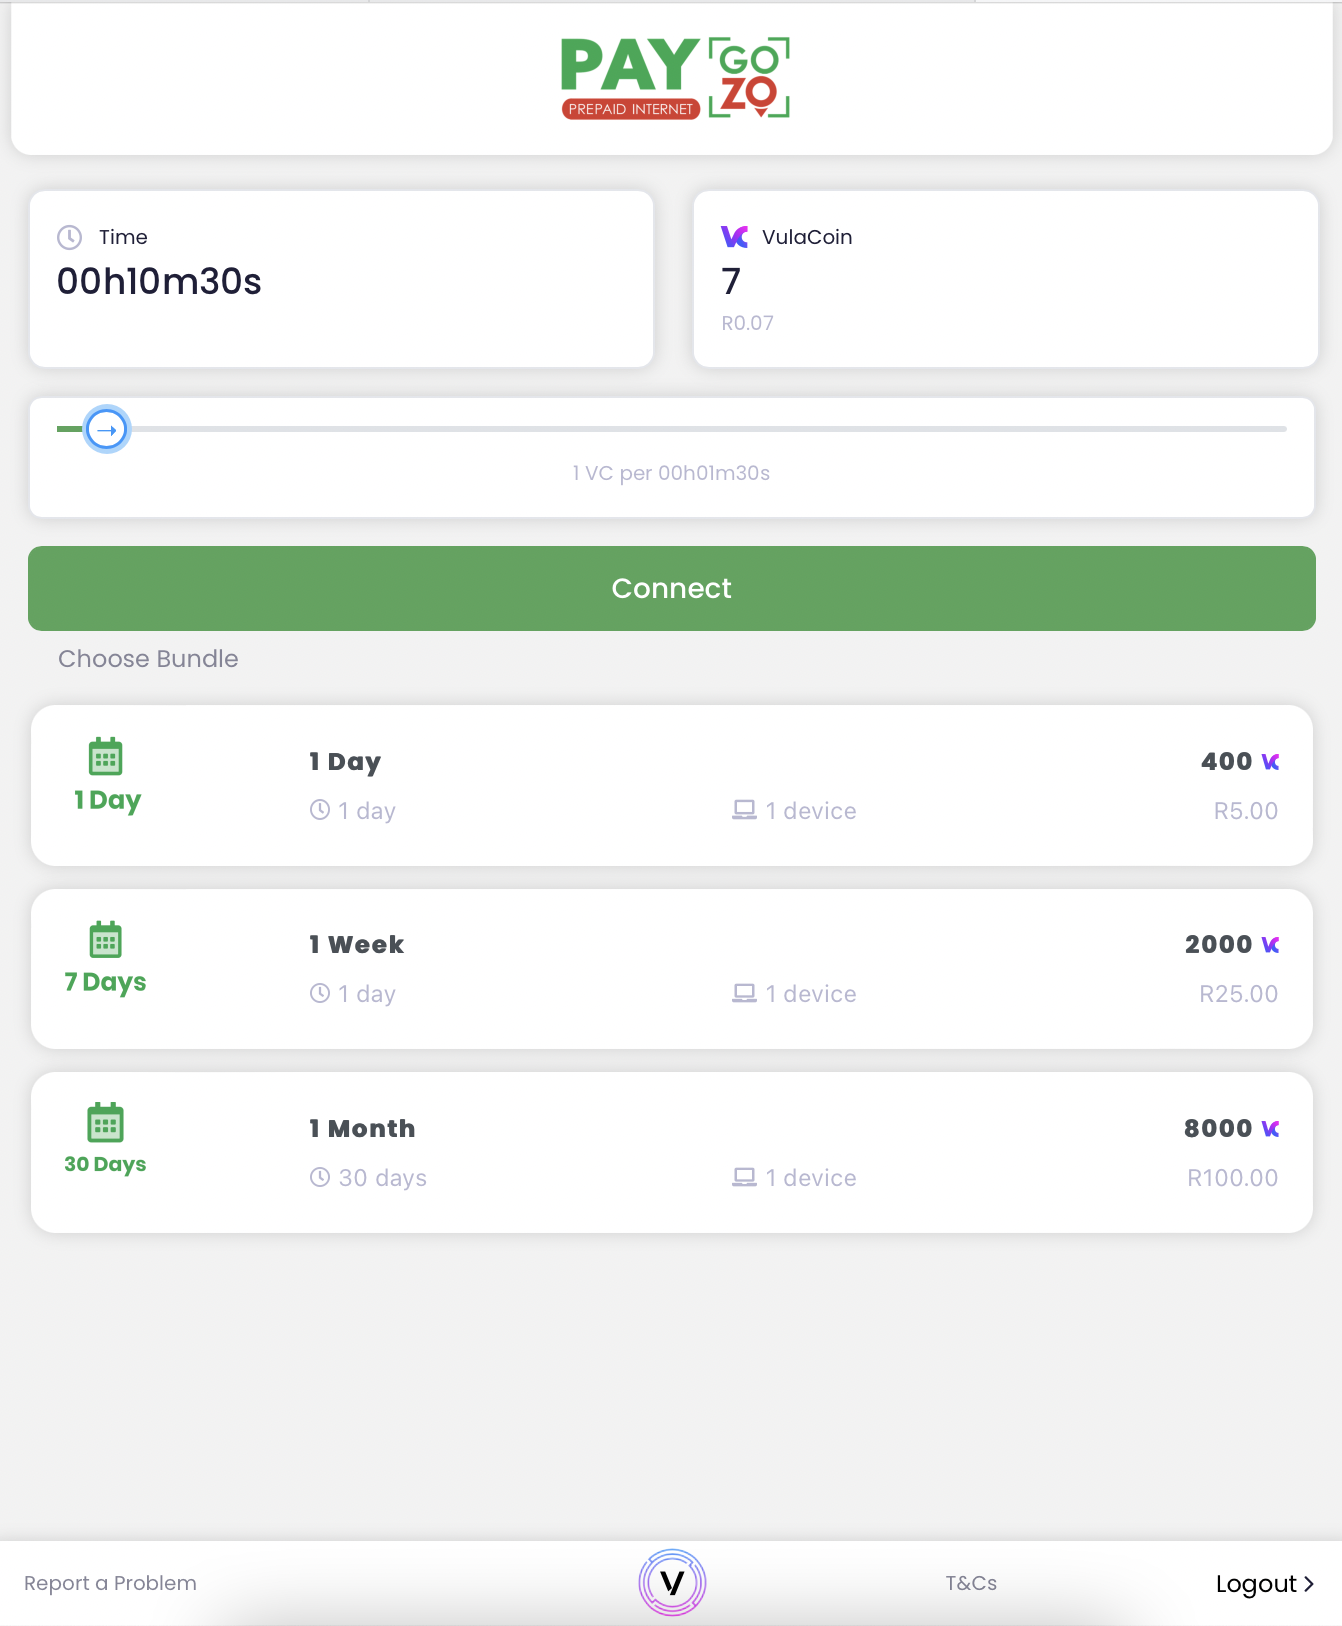
Once the user sets the Dynamic Product they would like to purchase, they will click the Connect button.
- Please note the maximum dynamic product time is 5 hours, as this was the parameter set in the admin portal.
- The selected time and equivalent VulaCoin value will be displayed.
- When you are on the Products page, click on the Slider icon (